

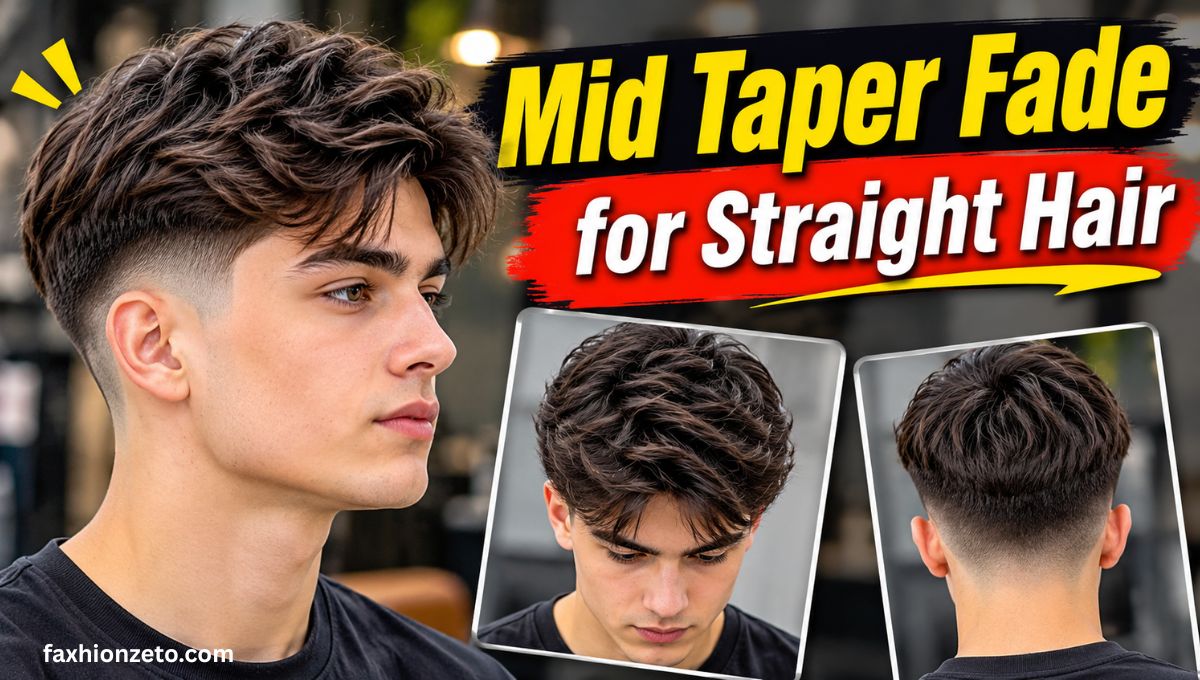
A mid taper fade for straight hair gives you a clean, balanced cut without the harsh contrast of a skin fade. The hair stays short around the ears and neckline, then blends smoothly into the length on top. Straight hair shows every line, so the blend, side weight, and neckline matter more than they would on waves or curls. Get those details right and the cut looks sharp for weeks.
This guide explains how a mid taper differs from a mid fade, who it suits, and how to choose from eight styles. You will also get a barber script, simple styling steps, and a realistic upkeep schedule, so you can book your next haircut with confidence. Every tip follows standard barbering practice, not guesswork. Let us begin with the basics.
Quick answer: A mid taper fade for straight hair starts its taper around the temple and ear level, keeps the shortest length at the sideburns and nape, and leaves enough weight on the sides to stay neat as it grows. It works with most face shapes and almost every top length.
What Is a Mid Taper Fade for Straight Hair?
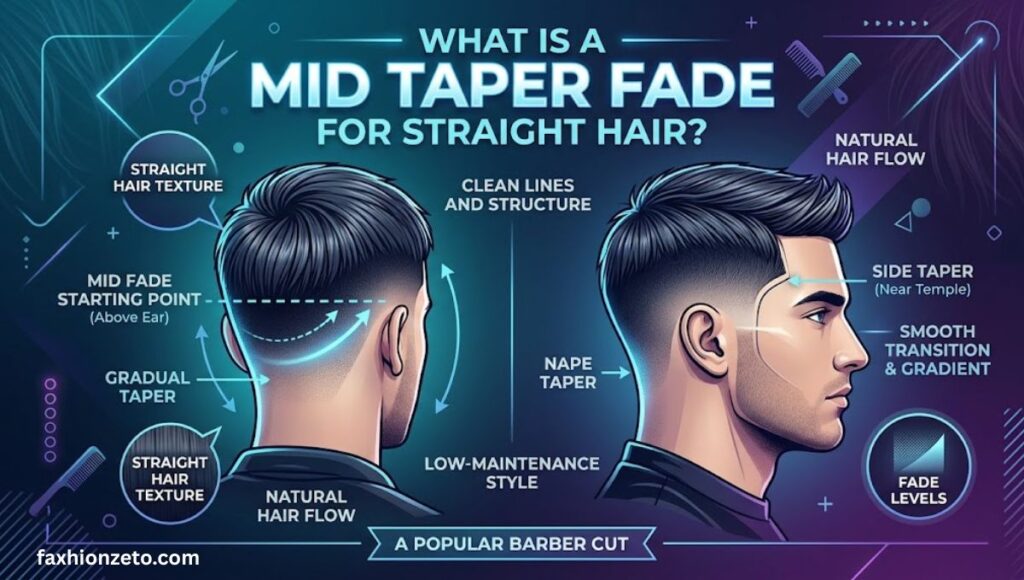
A mid taper fade is a haircut where the hair gets gradually shorter from the mid-point of the sides down to the sideburns and neckline. The taper begins at roughly temple height, which sits between a low and a high start point. Above that line, your hair keeps its length. Below it, the blend steps down in clean stages.
On straight hair, the result looks smooth and controlled. Each strand lies in the same direction, so the gradient reads clearly from a distance.
Here is what you should see in a well-done mid taper fade:
- A soft, even blend with no visible steps or patches
- Shorter hair around the ears and the nape
- Enough length on top to style in your chosen direction
- Clean edges around the temples and sideburns
- A neckline that suits how your hair grows
What Makes a Mid Taper Different From a Mid Fade?
Barbers use the words taper and fade in different ways, and the difference matters when you sit down.
A taper shortens the hair gradually, usually keeping some length at the shortest point. A fade usually goes shorter, often down to skin, and the blend travels higher and further around the head. Standard barbering references describe a taper as working mostly at the perimeter, around the sideburns and lower nape, while a fade covers more of the sides and back.
In simple terms:
- Mid taper: Softer, more natural, leaves visible hair at the shortest point
- Mid fade: Sharper, more contrast, often reaches skin
Many clients say “taper fade” and mean either one. A good barber will ask whether you want to keep length at the bottom or go down to skin. Answer that question clearly and the rest becomes easy.
Read More: 15 Best Mid Taper Fade Curly Hair Styles
How Straight Hair Changes the Finished Look

Straight hair behaves differently from wavy or curly hair under clippers. Knowing how helps you ask for the right cut.
- It shows lines. Straight strands lie flat, so any uneven blend is easy to spot.
- It grows out and down. As it lengthens, the sides can sit flat against the head or push outward, depending on density.
- It holds less shape on its own. Fine, slippery hair often needs a product or a blow-dry to keep lift.
- It reflects light. A clean taper looks polished, but a patchy one looks worse.
This is why barbers often add internal texture on top and keep a little weight on the sides. The taper does the structure, and the top does the personality.
Is a Mid Taper Fade Good for Straight Hair?
Yes, for most people. A mid taper fade for straight hair gives structure without forcing a dramatic contrast. It suits office settings, casual wear, and everything between. It also grows out more gracefully than a skin fade, which matters if you do not want a barber visit every two weeks.
The outcome still depends on your hair type and growth pattern, so let us look at both.
Fine, Thick, and Pin-Straight Hair
Your strand thickness and density change how the cut should be built.
Fine straight hair
- Keep the top slightly longer so it does not look sparse
- Ask for point-cut texture instead of heavy thinning
- Avoid a very short taper that exposes too much scalp
- Use a lightweight pre-styler or sea salt spray for lift
Thick straight hair
- Ask the barber to remove bulk from the sides so they do not puff out
- Keep some weight above the ear to avoid a helmet shape
- A matte clay or paste controls volume without shine
Pin-straight, coarse hair
- Expect the hair to stand away from the head as it grows, so plan shorter intervals
- Ask for a blend that is soft rather than razor sharp
- A little product with firm hold keeps the top from falling apart
If you have thinning hair, the mid taper is usually kinder than a high fade. It leaves more hair around the temples and crown, which can make the top look fuller by comparison. A shorter, textured top also hides scalp visibility better than a long, flat one.
Cowlicks, Natural Parts, and Hair Growth Direction

Straight hair shows growth direction clearly. A cowlick at the front hairline or a strong natural part can change which style works best.
A few practical rules:
- Work with the cowlick. A textured fringe or brush-up often hides a front cowlick better than a hard side part.
- Respect the natural part. If your hair always falls to the left, a left side part will stay in place with less effort.
- Check the crown. A swirl at the back can make a short top stand up. A slightly longer top weighs it down.
- Look at the nape. Some people have a low or uneven neckline. A natural neckline often looks better than a forced square one.
Tell your barber about these patterns before the clippers come out. They should look at the dry hair, not only the wet hair, because growth direction is clearer when it is dry.
Mid Taper Fade vs Low, Mid, and High Tapers

The height of the taper changes the whole feel of the cut. This is the section most people skip, and it is where most haircut regrets begin.
Low Taper Fade vs Mid Taper Fade
A low taper starts near the bottom of the sideburns and around the neckline. It leaves most of the sides untouched.
- Low taper: Subtle, conservative, easiest to grow out
- Mid taper: Balanced, visible contrast, still professional
Pick a low taper if you want a barely-there cleanup. Pick a mid taper if you want the cut to look intentional from the side and the back.
Mid Taper Fade vs Mid Fade
This comparison is about how short and how contrasted the blend is, not only where it starts.
| Feature | Mid taper fade | Mid fade |
| Shortest length | Visible hair, often a number 2 or 3 guard | Skin or very close to it |
| Contrast | Soft and natural | Sharp and bold |
| Grow-out | Slow and tidy | Faster and more obvious |
| Barber visits | Every 3 to 4 weeks | Every 2 to 3 weeks |
| Best for | Work and daily wear | A stronger, edgier look |
Guard numbers vary by brand, so treat them as a starting point and ask your barber to show you the length before they begin.
Mid Taper Fade vs High Taper Fade

A high taper starts near the parietal ridge, the point where the head curves toward the top. It removes more of the side hair and creates a bolder shape.
- High taper: Strong contrast, makes the top look taller, needs more upkeep
- Mid taper: More forgiving, works with more head shapes, easier to live with
If you are unsure, start with a mid taper. It is easy to take a taper higher next time. It is much harder to bring it back down.
What to Decide Before Booking Your Haircut
A good result starts before you sit in the chair. Make these four decisions first.
Choose Your Top Length and Hairstyle
The top length decides almost everything else. Pick the style first, then build the sides around it.
- Short (1 to 2 inches): Crew cut, brush-up, short crop
- Medium (2 to 4 inches): French crop, fringe, quiff, side part
- Long (4 inches or more): Curtains, slick back, blowout
If you are not sure, bring a photo. A picture saves ten minutes of guessing.
Decide the Taper Height and Depth
Height is where the taper begins. Depth is how short it goes at the shortest point.
- Height: For a mid taper, start around the temple and ear line
- Depth: Choose a visible length such as a number 2 or 3 for a softer look, or go closer for more contrast
A shadow fade sits between a taper and a skin fade. It leaves a faint trace of hair rather than bare skin. It is a nice option if you want contrast without a hard line.
Choose the Amount of Side Weight
Side weight is the hair you keep above the taper line. It controls how wide or narrow your head looks.
- More weight: Softer, more classic, better for thick or fine hair that needs support
- Less weight: Cleaner, more modern, better for strong cowlicks and thick hair
Most straight hair does best with moderate weight. Too little makes the top look like it is sitting on a pole. Too much makes the sides stick out.
Decide on the Neckline and Lineup
The neckline is the shape at the back of your neck. The lineup is the clean edge around your forehead, temples, and sideburns.
- Natural neckline: Follows your hairline, grows out softly
- Tapered neckline: Blends gradually, the most natural option for a taper
- Squared neckline: Sharp and defined, but looks messy within a week or two
For a lineup, ask whether you want crisp edges or a softer finish. A hard line looks great on day one but shows regrowth quickly. If your hairline is uneven, a softer lineup usually looks more natural.
8 Mid Taper Fade Styles for Straight Hair

Here are eight proven ways to wear a mid taper fade for straight hair. Each one includes who it suits and what to ask for.
1. Textured French Crop
A French crop has a short, forward-pointing fringe and a tidy, textured top. It is one of the best mid taper fade styles for straight hair because it hides a receding hairline and needs very little effort.
- Top length: 1.5 to 3 inches
- Ask for: Point-cut texture, a short blunt fringe, and a mid taper on the sides
- Best for: Fine to medium straight hair, thinning at the temples
- Product: Matte clay or texture spray
2. Crew Cut or Short Brush-Up
A crew cut is short, neat, and practical. The top is cut slightly longer at the front so it can lift or lie flat.
- Top length: 0.5 to 1.5 inches
- Ask for: A longer front, a mid taper, and clean sideburns
- Best for: Thick or coarse hair, busy schedules
- Product: Light paste or none
This is the lowest-effort option on the list. It also grows out well, which makes it a safe first choice.
3. Textured Fringe
A textured fringe sweeps the front hair across the forehead with broken, separated ends. It adds youth and movement to a straight cut.
- Top length: 2.5 to 4 inches at the front
- Ask for: Layered ends, internal texture, and a mid taper that keeps the sides tidy
- Best for: Medium density hair and rounder face shapes
- Product: Styling paste or sea salt spray
If you have a front cowlick, tell your barber so the fringe can be cut to fall with it.
4. Side Part or Comb-Over
The classic side part looks sharp with a mid taper because the contrast frames the part line. It suits formal settings and casual wear.
- Top length: 3 to 4 inches
- Ask for: A natural part, a soft or hard part line, and a mid taper with moderate side weight
- Best for: Straight hair that already falls to one side
- Product: Pomade for shine, or clay for a matte look
Use a comb after drying to set the part, then lock it in with a light hold.
5. Quiff
A quiff lifts the front of the hair up and back for height. On straight hair, it needs a little help to hold its shape, but the payoff is a bold silhouette.
- Top length: 3 to 5 inches at the front
- Ask for: Longer front layers, shorter sides, and a mid taper that supports the lift
- Best for: Medium to thick hair, oval or long faces
- Product: Pre-styler, then clay or pomade
Blow-drying upward with a round brush gives the quiff most of its volume before any product goes in.
6. Middle Part or Curtains

A middle part with curtains lets the hair fall to each side of the face. With a mid taper, it looks clean instead of messy.
- Top length: 3 to 5 inches
- Ask for: A centered part, even length on both sides, and a mid taper with tidy edges
- Best for: Straight hair with a natural center part, square or oval faces
- Product: Lightweight cream
The taper keeps the longer top from looking heavy. Without it, curtains can look overgrown on straight hair.
7. Slick Back or Natural Flow
The slick back combs the hair straight back from the forehead. Natural flow is looser and lets the hair fall back without product.
- Top length: 3 to 5 inches
- Ask for: Length on top, a mid taper, and a clean neckline
- Best for: Straight hair with good density, those who want a polished look
- Product: Pomade or cream, applied to damp hair
This style shows the taper very clearly, so the blend needs to be good.
8. Blowout
A blowout is a voluminous, lifted top that is blow-dried into shape. It is the most styled option here, and it looks great with a mid taper.
- Top length: 4 to 6 inches
- Ask for: Layered top, soft ends, and a mid taper that keeps the sides tight
- Best for: Fine to medium straight hair that needs volume
- Product: Heat protection spray, light mousse, and texture spray
The blow-dry is the real work here. Learn the technique at your first appointment if you can.
How to Choose the Right Style for Your Hair and Face

There is no single best style. There is a best style for your hair, your head, and your routine.
How Hair Density and Strand Thickness Affect the Cut
Density is how many hairs you have. Strand thickness is how wide each hair is. They behave differently.
- Low density, fine strands: Go shorter on top, or use texture to add body
- High density, thick strands: Keep the sides lean and use matte products
- High density, fine strands: Most flexible, handles almost any style
- Low density, thick strands: Add length to cover gaps, and avoid very short tapers
If your scalp shows through under bright light, avoid heavy product and very short tops.
How Face and Head Shape Affect the Silhouette
The taper changes how wide or narrow your head looks. Use that to your advantage.
- Round face: Add height on top with a quiff or textured fringe
- Square face: A side part or slick back softens strong angles
- Oval face: Almost anything works, so choose by lifestyle
- Long face: Avoid too much height, and choose a fringe or crop
- Flat back of head: A little extra length near the occipital bone adds shape
The occipital bone is the bump at the back of your skull. If it is prominent, keep the taper soft around it. If it is flat, leave a little more length there.
How Much Styling and Upkeep Can You Manage?
Be honest about your routine. A cut you cannot style is a cut you will not like.
- Under 2 minutes: Crew cut, French crop, natural flow
- 5 minutes: Side part, textured fringe, slick back
- 10 minutes or more: Quiff, blowout, curtains
Also think about barber visits. If you can only manage one appointment a month, choose a softer taper and a longer top.
What to Ask Your Barber for
Most bad haircuts come from vague instructions. A short, clear script fixes that.
Show Front, Side, Back, and Top Reference Photos

One photo is not enough. Bring four if you can.
- Front: Shows the fringe or hairline
- Side: Shows where the taper begins and the amount of contrast
- Back: Shows the neckline shape
- Top: Shows texture and length
If your reference photo shows someone with a different hair type, tell your barber. They can adjust for your density and growth pattern.
Specify Height, Depth, Bulk, and Neckline
Here is a script you can use or adapt:
“I would like a mid taper fade. Start the taper around my temples and ears, and keep a number 2 at the shortest point. Leave moderate weight on the sides, and keep the top about three inches with texture. Blend the neckline naturally, and keep the lineup soft.”
To cover everything, mention:
- Height: Where the taper begins
- Depth: How short it goes
- Bulk: How much weight stays on the sides
- Neckline: Natural, tapered, or squared
- Lineup: Crisp or soft
- Top: Length, texture, and direction
Ask the barber to show you the guard before cutting. It takes five seconds and prevents most surprises.
How to Style a Mid Taper Fade for Straight Hair

Styling is where a good cut becomes a great one. The steps are simple.
Dry Your Hair in the Direction You Want
The way you dry your hair sets its shape. Straight hair remembers direction.
- Towel-dry until the hair is damp, not wet.
- Apply a heat protection spray if you use a blow-dryer.
- Dry the roots first, aiming the air in the direction you want the hair to fall.
- Use a round brush or your fingers to lift the front.
- Finish with a cool shot of air to set the shape.
For a side part, dry the hair away from the part. For a quiff, dry it up and back. For curtains, dry it down and outward.
Choose the Right Product for Your Hairstyle
The product should match the finish you want, not just the brand you like.
- Lightweight cream: Soft hold, natural finish, good for curtains and natural flow
- Styling paste: Medium hold, some texture, good for fringes and crops
- Matte clay: Strong hold, no shine, good for thick hair and quiffs
- Pomade: Shine and control, good for side parts and slick backs
- Texture spray: Adds grip to fine hair before or after styling
- Pre-styler: Builds volume before the main product
Use a pea-sized amount first. Rub it between your palms until it disappears, then work it through from back to front. Add more only if you need it.
Straight hair gets greasy fast, so avoid heavy products on fine hair. If your hair feels stiff, you used too much.
How Often Does a Mid Taper Fade Need Maintenance?
A mid taper fade is easier to keep than a skin fade, but it still needs regular trims. Most barbers recommend a visit every three to four weeks. Straight, fast-growing hair may need a cleanup closer to three.
What It Looks Like After 2 to 3 Weeks
At this stage, the shape is still good but the details are softening.
- The sideburn curve starts to fill in
- The neckline loses its definition
- The blend looks softer and less contrasted
- The sides begin to widen slightly
- The top may feel heavier, especially if it is long
Many people like this stage because the taper looks more relaxed. You can often add a quick home cleanup around the neck and ears, but avoid trimming the taper line yourself.
When to Book Your Next Trim
Book your next appointment when you notice any of these:
- The taper line has disappeared into the sides
- The hair around your ears curls outward
- The neckline looks fuzzy or uneven
- Your top has lost its shape
- You are fighting to style it every morning
A simple rule: if you are thinking about it, you are probably due. Booking a standing appointment every three to four weeks keeps the shape consistent.
Frequently Asked Questions
Is a Mid Taper Good for Straight Hair?
Yes. It adds structure and contrast while keeping the cut easy to style and grow out.
What Fade Is Best for Straight Hair?
A mid taper fade is a safe, flexible choice. A low taper suits a subtle look, and a high fade suits a bolder one.
Does a Taper Fade Work With Straight Hair?
Yes. Straight hair shows a clean blend clearly, so a skilled barber makes it look very sharp.
Does a Mid Taper Fade Have to Go Down to Skin?
No. A taper usually keeps visible hair at the shortest point, and only a skin fade goes to bare skin.
Can a Mid Taper Fade Work With Fine or Thinning Straight Hair?
Yes. Keep the top slightly longer and add texture so the hair looks fuller.
Can You Get This Cut With a Cowlick or Strong Natural Part?
Yes. Ask the barber to cut the top so it falls with the cowlick, not against it.
What If the Sides Stick Out as the Hair Grows?
Ask for less side weight and book a trim every three weeks. Thick straight hair benefits most from this.
Should the Barber Line Up a Naturally Uneven Hairline?
A soft lineup usually looks better. A hard line on an uneven hairline can look forced.
Can a Mid Fade Grow Into a Mid Taper at the Next Appointment?
Yes. Ask the barber to leave more length at the shortest point so it softens into a taper.
Conclusion
A mid taper fade for straight hair offers structure, versatility, and easy upkeep. Choose your top length first, then decide how high the taper starts, how short it goes, and how much weight stays on the sides. Bring clear reference photos and ask to see the guard before the first pass.
At home, dry your hair in the direction you want it to fall and pick a product that matches your finish. Book a trim every three to four weeks to keep the blend clean and sharp. If you are unsure, start with a mid taper and adjust next time.

Isaac Flynn is a fashion writer and content researcher at Faxhionzeto.com. He focuses on fashion trends, styling ideas, clothing guides, and modern wardrobe inspiration. With an interest in visual culture and fashion journalism, Isaac creates practical, reader focused articles that turn evolving style ideas into clear, useful information for everyday fashion enthusiasts.